

There are several reasons for keeping your Azure AD nice and tidy. Locking down features, removing unused objects and applications and so on – all this keep the the attack surface of your environment lower and makes it easier for you to manage your Azure AD, do access reviews on access groups, roles and so on. So for making it a bit more easy for you I will list out 5 tips for getting a more tidy and clean Azure AD.
First tips – M365 Groups
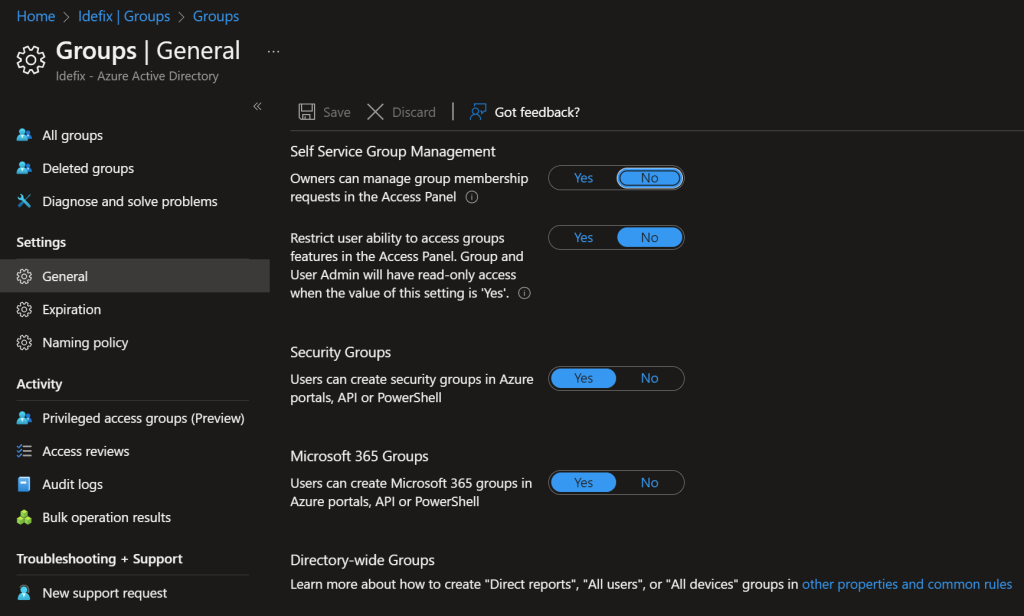
Lock down who can make “Microsoft 365 Groups”. By doing this you block users from creating houndreds of testing group and often (almost never) they don`t delete groups again.
This need`s to be done within Powershell, but in short notes we create a security group in Azure AD that contains the super users who is allowed to create M365 groups. Then we run a short PowerShell script for locking it down
See learn.microsoft.com for full guide/documentation for this process
Connect-AzureAD

$GroupName = "<GroupName>"
$AllowGroupCreation = $False

Connect-AzureAD

$settingsObjectID = (Get-AzureADDirectorySetting | Where-object -Property Displayname -Value "Group.Unified" -EQ).id
if(!$settingsObjectID)
{
    $template = Get-AzureADDirectorySettingTemplate | Where-object {$_.displayname -eq "group.unified"}
    $settingsCopy = $template.CreateDirectorySetting()
    New-AzureADDirectorySetting -DirectorySetting $settingsCopy
    $settingsObjectID = (Get-AzureADDirectorySetting | Where-object -Property Displayname -Value "Group.Unified" -EQ).id
}

$settingsCopy = Get-AzureADDirectorySetting -Id $settingsObjectID
$settingsCopy["EnableGroupCreation"] = $AllowGroupCreation

if($GroupName)
{
  $settingsCopy["GroupCreationAllowedGroupId"] = (Get-AzureADGroup -SearchString $GroupName).objectid
} else {
$settingsCopy["GroupCreationAllowedGroupId"] = $GroupName
}
Set-AzureADDirectorySetting -Id $settingsObjectID -DirectorySetting $settingsCopy

(Get-AzureADDirectorySetting -Id $settingsObjectID).Values
Second tips – Naming convention M365
Since we already have locked down creation of groups we can aim to do the naming convention in two ways. We can create a provisioning solution where users can order their groups and from there we are setting names, members and having approval process for ordering.
We can also create namin convention rules in Azure AD where we can set a prefix and or suffix. This can be set by a attribute from the user object creating the group or by a fixed string.
Within this feature there is also a “Blocked words” list. This is a list that you can upload with blocked words so that users cannot creat or use words that you put on that list. A maximum of 5000 words can be added to this list.
Learn more about naming conventions here at learn.microsoft.com
All settings are foud under “Azure AD – > Groups -> Settings”
Third tips – User attributes
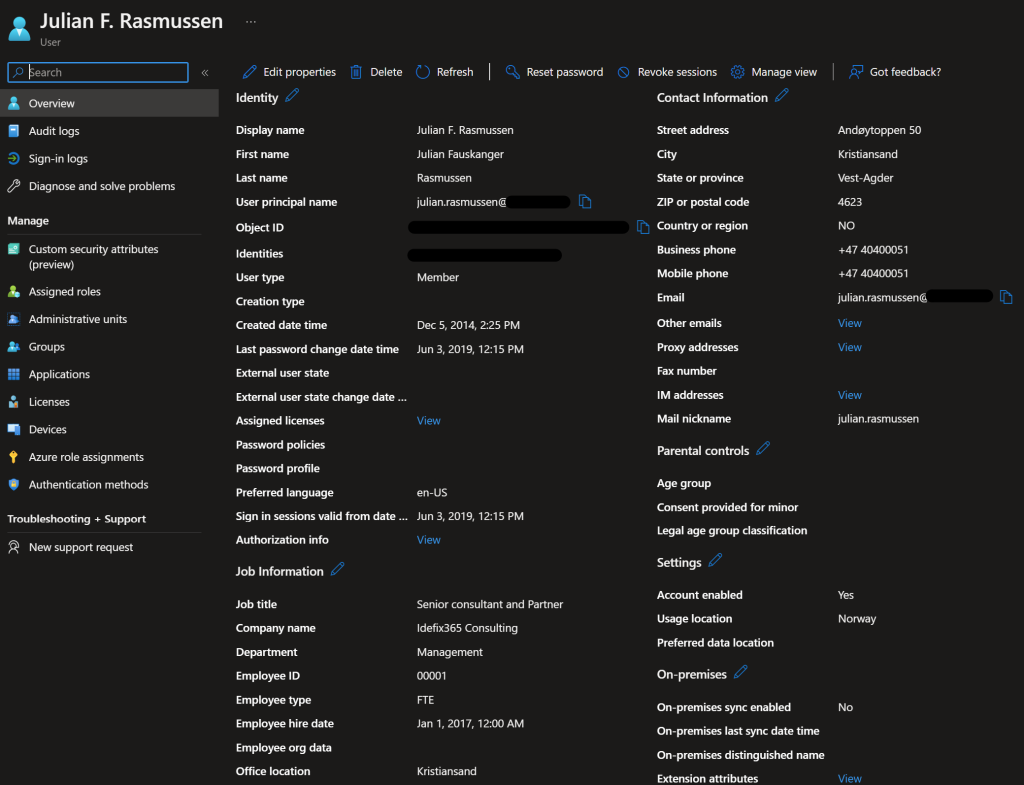
Maybe not a tidy up and clean Azure AD tips – but I like to have good data quality in Azure AD so that many attributes can be used when creating dynamic groups, homemade scripts and so on. This tips is closely attached to the next tip for User provisioning. So please add as much information as possible on all user objects.
All of these attriutes must also match the organization in that manner so that we are not ending up with 1000 different departments that actually are the same.
Fourth tips – User provisioning
To make it easier for the entire organization and specially the IT department who are creating users, then the need of a easy user provisioning system is always there! Based on a provisioning system we can add more attributes without having users to type all of it.
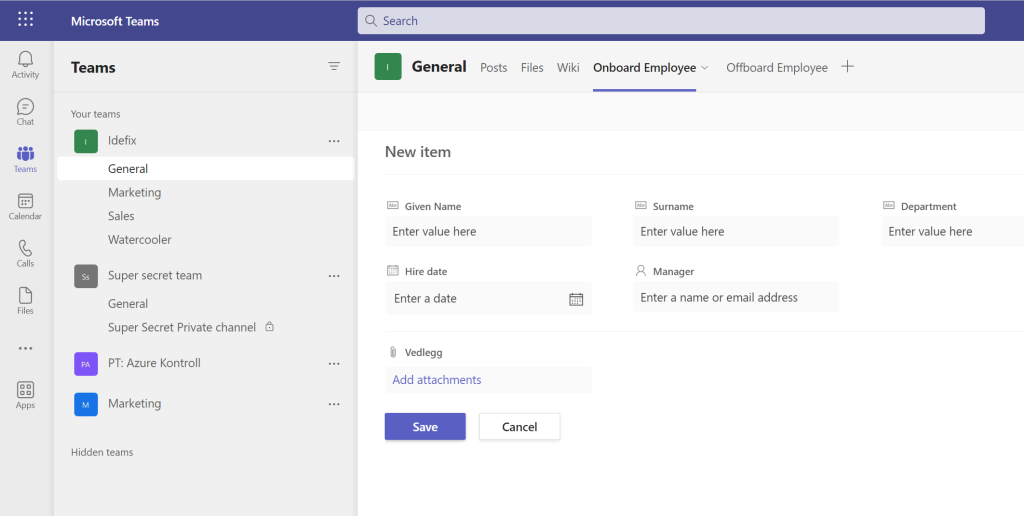
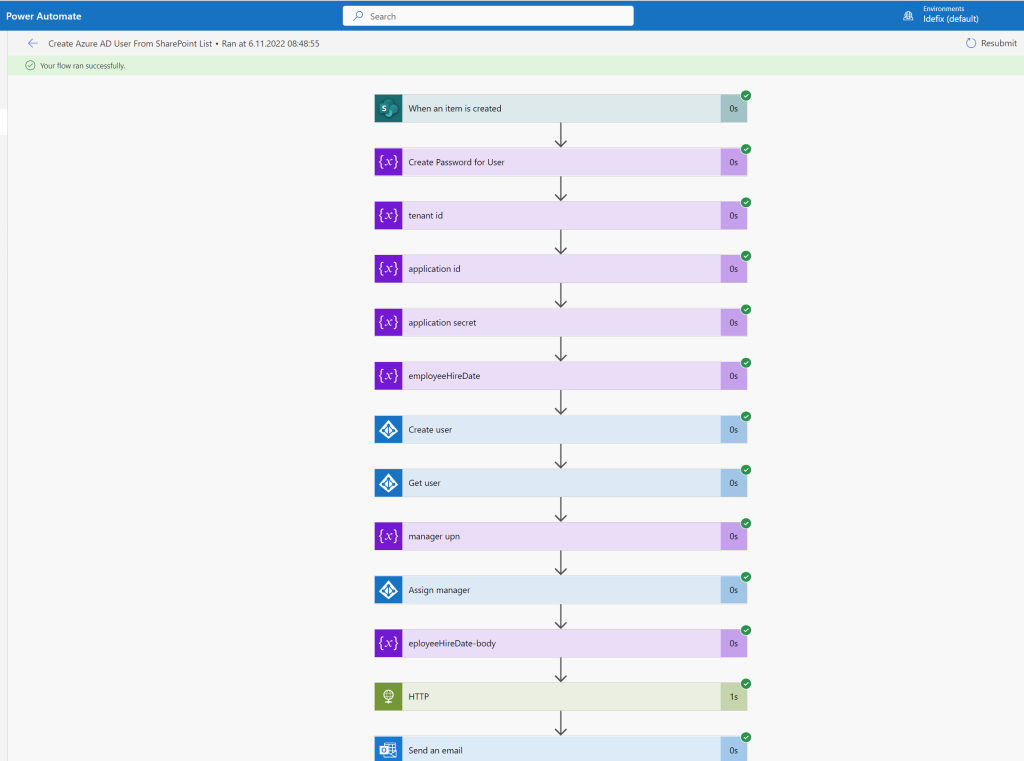
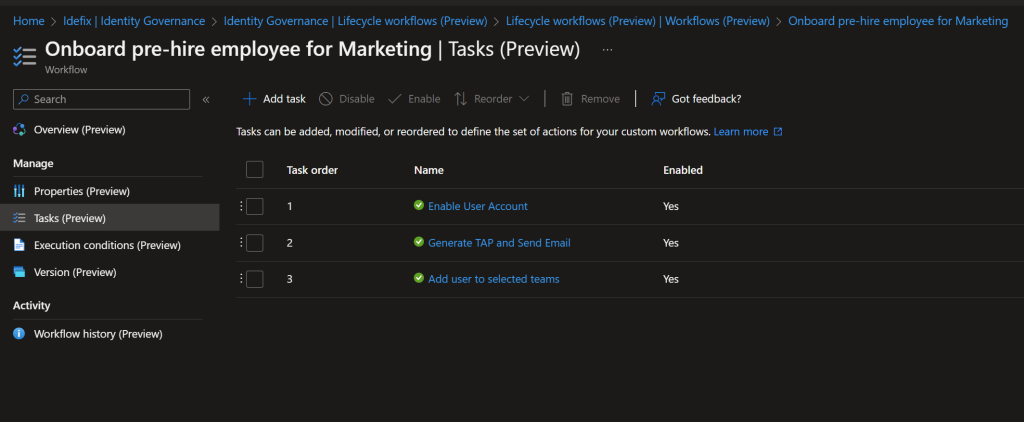
An super easy user provisioning can just be a SharePoint Lists list in a company wide Teams Team called onboarding. Power Automate that creates a user disabled and based on “Employee Hire Date” we can user “Lifecycle workflows” within Identity Governance to do tasks a few days before users are starting in the company. In the pictures below we see how we can add input for user creation, and a Power Automate that created the user in Azure AD with all attributes added (and keeps it disabled). The last part is where the Lifecycle workflow`s runs and enable the user, add license and sends out a Temporarly Access Pass so that users can sign-in and setup the security for their account.
Fifth tips – Enterprise applications
This tips is to keep good governance and security posture for applications that are connected to Azure AD. This is applications that connects to Azure AD to exstract information about signed in users and also can claim access for services that the end-user have access to – this can be mailbox for the user, Onedrive for business or sharepoint sites.
Malicious applications can therefore gain access to information and documents that they should not have access to when the end-user them self can approve the application access.
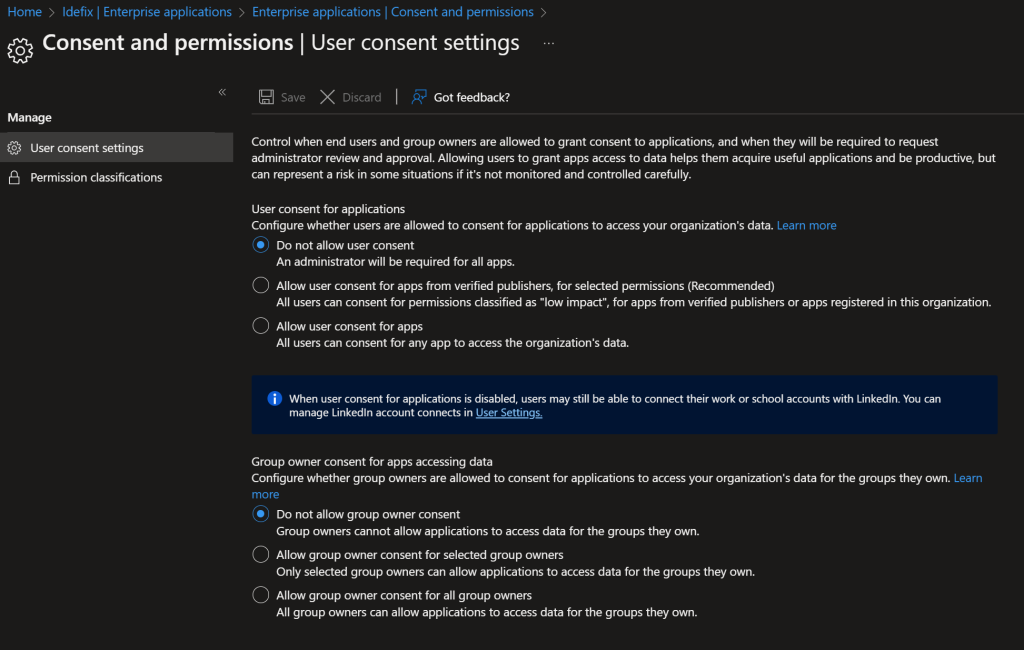
So we start with blocking for User concent for everyone.
head into “Azure AD -> Enterprise Applications -> Consent and permissions” and set both settings to “Do not allow user Consent” / “Do not allow group owner consent”
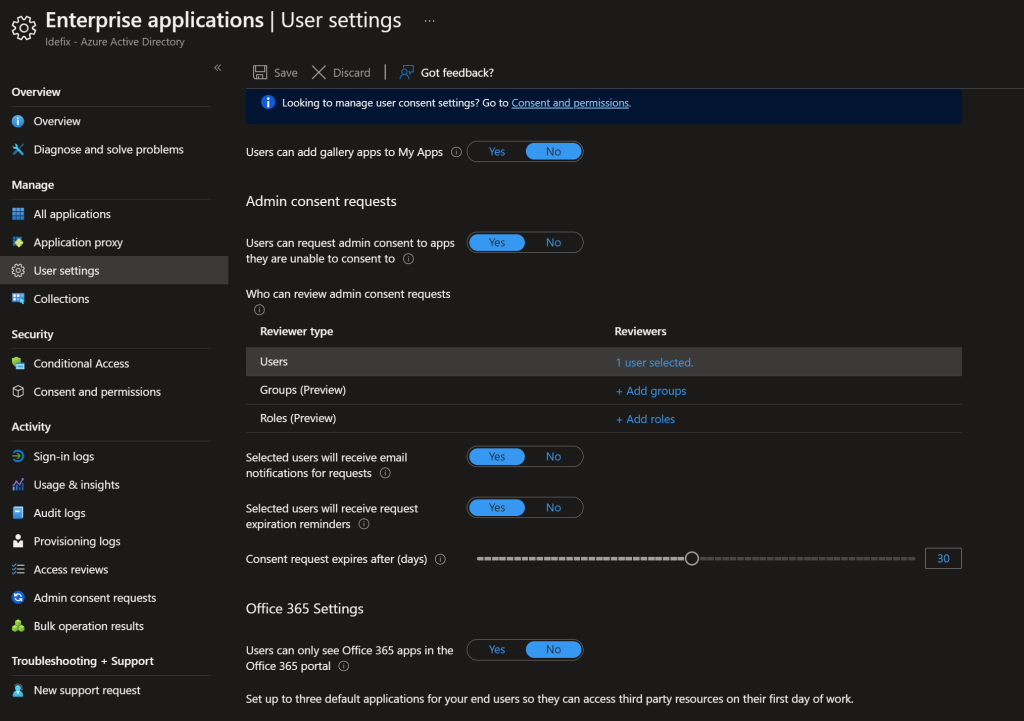
After we have done this we need to be sure that a administrator is getting notifications when users are trying to get consent for a application.
This can we do here – “Azure AD -> Enterprise Applications -> User settings” and set the settings like this.
The official documentation is at learn.microsoft.com