

Microsoft keeps making security smarter with automation tools like Security Copilot agents. These AI helpers are changing how businesses protect their systems. Paired with Entra ID’s conditional access, they give security teams better control and insight. This post will describe how to get started with the Conditional Access Optimization Agent. You’ll learn how to set it up, manage it, and keep your organization safe by using the Conditional Access Optimization Agent.
Key Features and Capabilities
These agents work closely with your security tools. They can:
- Eliminate security gaps introduced by newly onboarded users and applications.
- Take on repetitive tasks like reviewing access logs.
- Suggest policy improvements based on best practices.
- Automate responses to threats or risky behaviors.
- Learn over time to become more accurate with their advice.
Deep Dive: Entra ID Conditional Access Optimization Agent.
What Is It and Why Does It Matter?
The Conditional Access Optimization Agent is a new helper in Entra ID that automatically evaluates your access policies. Its main goal? Make sure your policies are right and working. It aligns with the Zero Trust model—where no one trusts everyone by default. With this agent, you get recommendations to tighten or simplify access rules.
Imagine having an extra set of eyes constantly scanning your access setup. It flags missing MFA, old policies, or device controls that need attention. All this helps keep your environment safer and easier to manage.
How to Deploy and Set These Up
Prerequisites:
- You need roles like Security Administrator or Global Admin.
- You must have a Microsoft Entra ID P1 license.
- You myst have a minimum of 1 Secure Compute Unit
- For device controls, an Intune license is necessary.
- The tenant must have Security Copilot enabled.
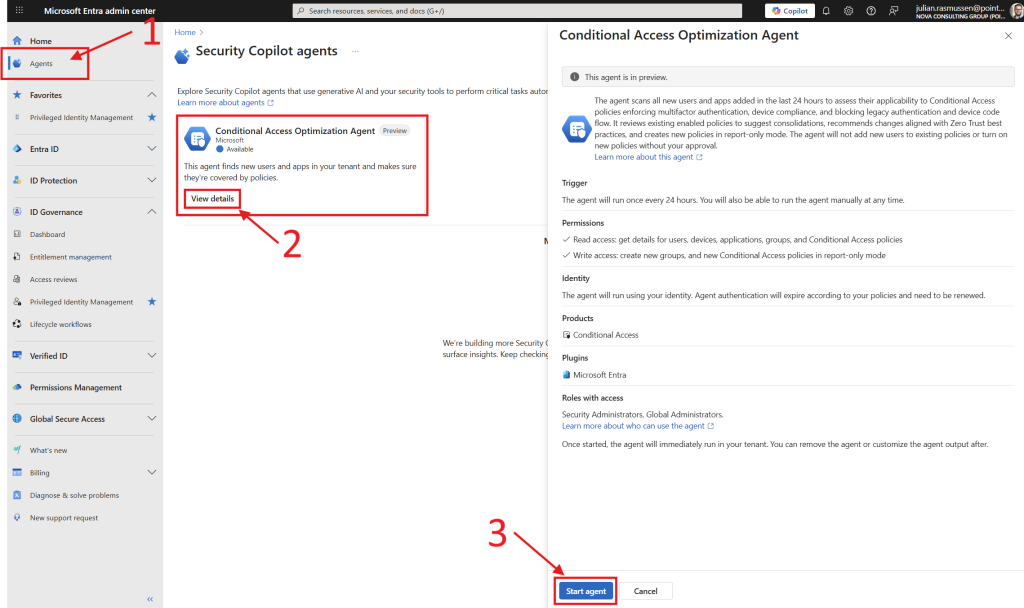
Getting Started:
- Navigation begins in the Entra Admin Center.
- Find “Agents” in the left menu.
- Under the Conditional Access Optimization Agent – click “View details”
- then read the information and “Start agent”
Once started, it will run a initial check and give you directly feedback on results. after the initial run it’s scheduled to run daily, giving suggestions and so on. You’ll see these in the Admin Center under “Agents” and viewing details on the “Conditional Access Optimization Agent”
Managing the Agent
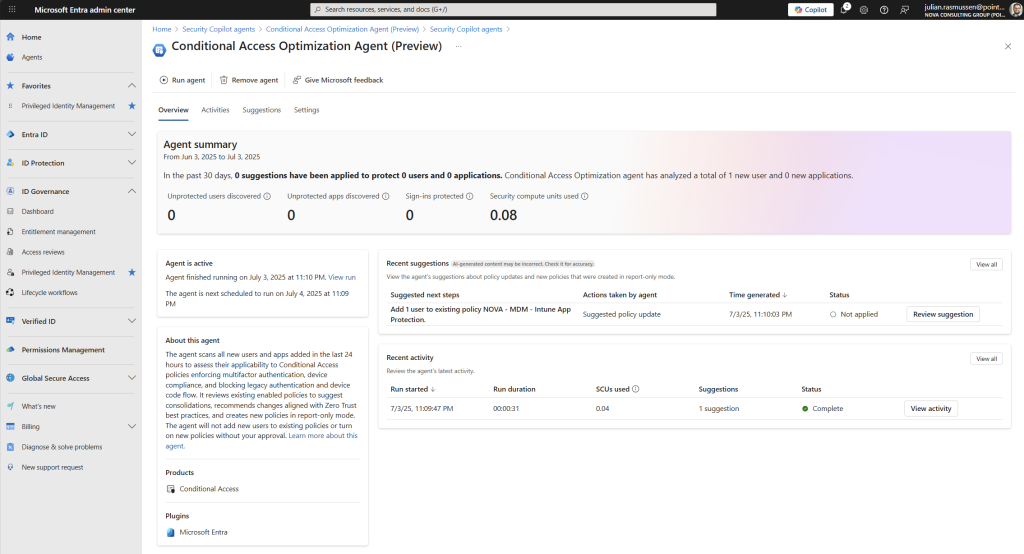
Monitoring is straightforward:
- We have a nice “Agent Sumary” in the midle of the screen giving us key-information the last 30 days.
- The “Recent Activities” section shows us some of the latest run’s that we can drill into by clicking on the “View activity” button for each run.
- At the “Recent suggestions” section we see all the latest sugestions that the agent has found and from here we can drill into each of them by clicking “Reveiw suggestion”
- At the top of the screen we can manually run the agent whenever we want or we can remove the agent. – be aware, once removed, it won’t run again. But it’s really easy to just enable it again by doing the steps to i described for setting it up.
Note: The agent runs once a day automatically and cannot be paused mid-cycle.
Activities
If we switch focus over to the “Activities” menu, we get a complete list over all the runs that the agent has done with start date, how many minutes it has runned, how many SCU`s it used to run through the cycle and a number of suggestions it found on each run.
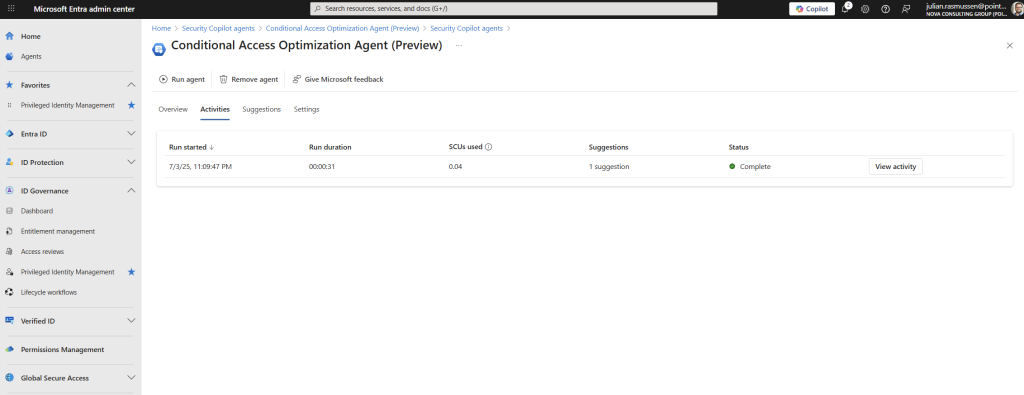
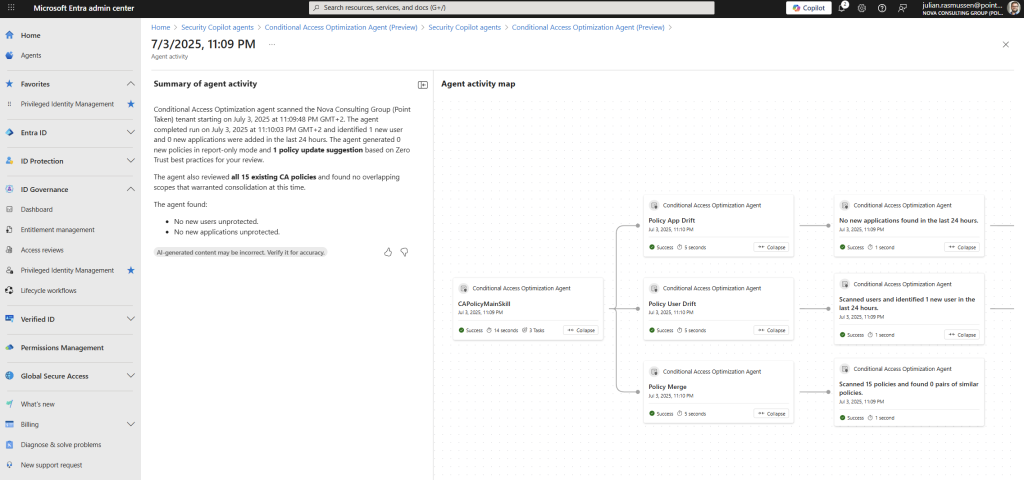
If we go further into each activity or run’s we can click on “View Activity” – this will load the specified activitiy and show you a overview of all the steps or activities it has done to get to the conclution of each run.
- We get a good sumary of agent activity
- Drill down overview of each of the checks that the agent is performing.
Suggestions
If we go back to the Agent overview page and navigate our self into the “Suggestion” menu we will get a complete overview of all the suggestions that the Agent has concluded we should do to our environment. At this demo environment I only have one suggestion.
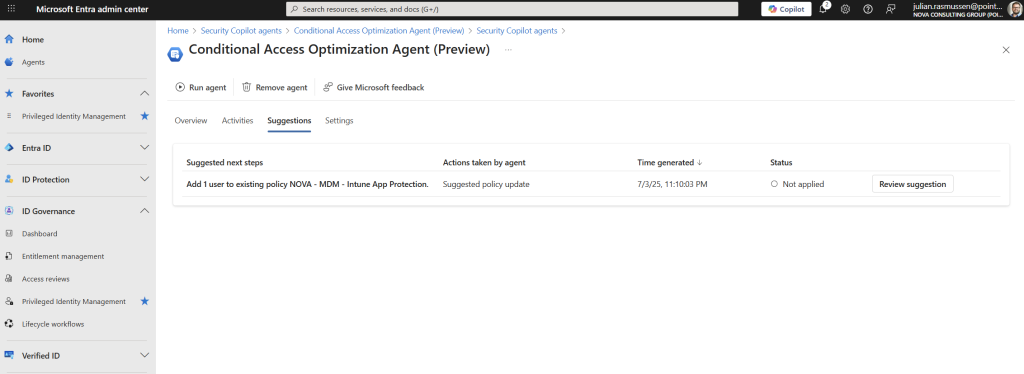
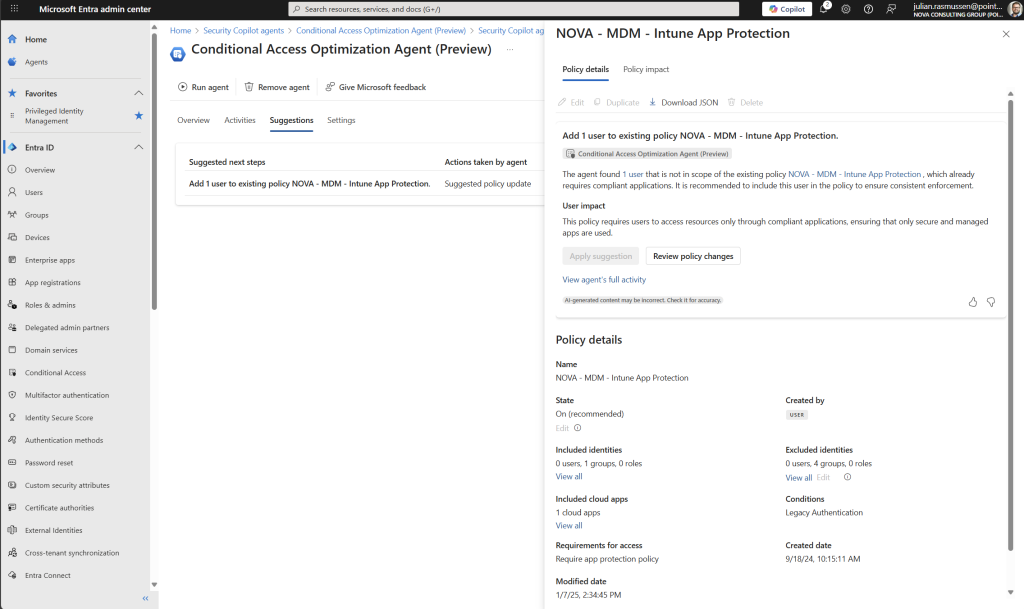
Just as we did with the Activity page, we can review each suggestion by going deeper into each suggestion. Click on “Review suggestion” and you will get a overview of what the suggestion wants to do.
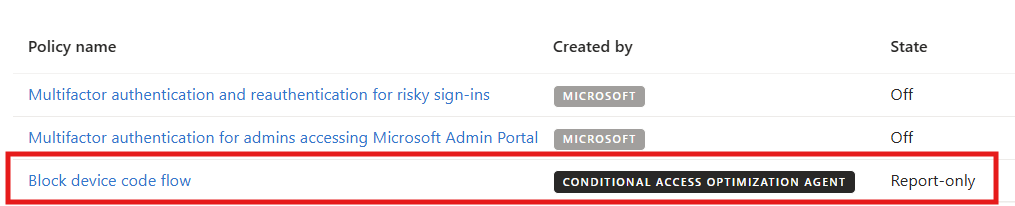
Note: If the Agent suggests to create new Conditional Access Policies, they will be created as “Report-Only” policies so that an Administrator can review the CA policy before enabeling it in their environment. All CA policies created by the Agent is marked as “created by Conditional Access Optimization Agent” in the Conditional Access menu.
As we can see here we get a informative overview of the suggestion in details – there is also a “Policy impact” page here where we can se how the change or a new policy is affecting our environment before we decide to apply or create anything.
Settings
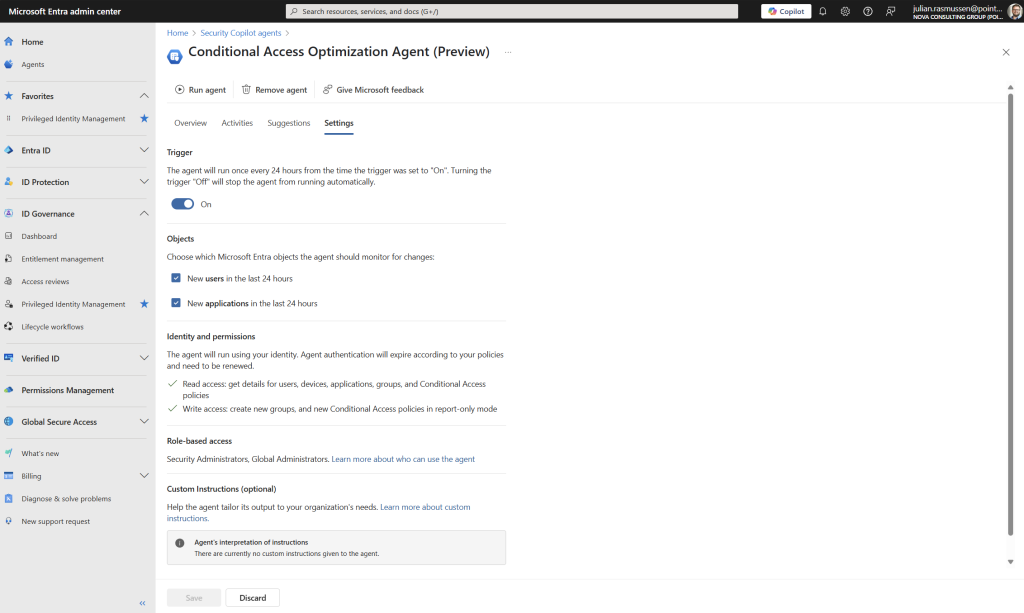
So the last page we have here is the settings page and from here we have some toggle options and settings that we can adjust to fit your needs.
- Trigger – this is on/off for the Agent.
- Objects – here you can choose if the Agent is to scan for Users and Applications or only one of them.
- Identity & permissions – Gives you some information on how the Agent is operating.
- Role-based access – what kind of roles is needed to be able to navigate into the Agent after it is initiated.
- Custom Instruction – this is a cool feature where we can give the agent some instruction like “Exclude users in a certain group from any policy that require multifactor authentication”. This makes the Agent more tailored to your own environment.
Best Practices for Using Conditional Access Optimization Agent
Deployment Tips
- Assign the right permissions—roles like Security Admin or Global Admin are necessary at all time for the user that initiate the Agent.
- Verify license requirements—Entra ID P1 and Intune if device control is involved and of course Secure Compute Units (1 is enough for this agent (SCU))
- Follow a step-by-step setup. Enable the agent, watch initial results, and review suggestions regularly.
Conclusion
Conditional Access Optimization Agents are powerful tools designed to elevate your organization’s security posture. By simplifying policy management, identifying misconfigurations, and aligning your setup with best practices, these agents offer a proactive approach to securing access.
Setting up the agent requires a little bit of planning, but once it’s in place, it provides ongoing guidance and automation that can significantly reduce the time and effort spent on manual policy reviews and adjustments. It’s like having a smart assistant constantly watching over your access policies, ensuring they remain effective and compliant.
Is it worth the investment?
If you’re already leveraging Secure Compute Units (SCUs), then absolutely—this agent is a natural extension that brings added value. However, if this is your sole use case for SCUs, the cost might outweigh the benefits. In that scenario, it’s worth evaluating whether the automation and insights provided justify the expense.
From my experience, organizations that prioritize security and efficiency find this tool to be a game-changer. It’s not just about optimization—it’s about staying ahead in a landscape where threats evolve constantly.
As Microsoft continues to update and expand the Conditional Access Optimization Agent, your organization will be better equipped to protect your identities. For any security team, integrating Security Copilot Agents we will se safer and better configured systems.
Resources
- Alex Simons on the Entra Tech Community – https://aka.ms/EntraCopilotGANews2025
- Dorothy Li on the Microsoft Security Blog – https://aka.ms/CopilotIntuneandEntraGA