
The Automated Investigation & Response feature under Threat management in Security & Compliance admin portal is a pritty new and amazing feature in Office 365.
To use this feature you need to have “Office 365 Advanced Threat Protection Plan 2” licenses witch you can purchase standalone or it`s included in the Office 365 E5 license and yes – you need to be a “Global Administrator” or “Security Administrator” to configure the service. Once configured you can also use “Security Reader” or “Security Operator” to see whats happening.
Have a look here to see all capabilities within “Advanced threat protections”.
So over to Automated Investigation & Response (AIR) – have a look at this screenshot
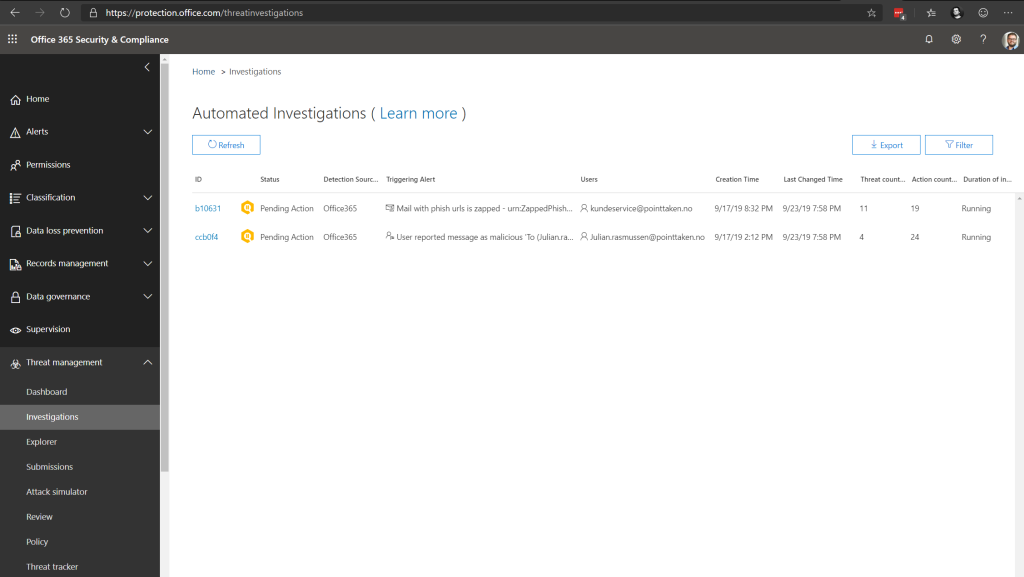
As we see her we have two detection on-going which waiting on user action. The first one in the picture is automatically found by the system and the second one is a email which I reported through the “Message Report” add-in for Outlook which are deployed to all users (Both Outlook and Outlook Web).
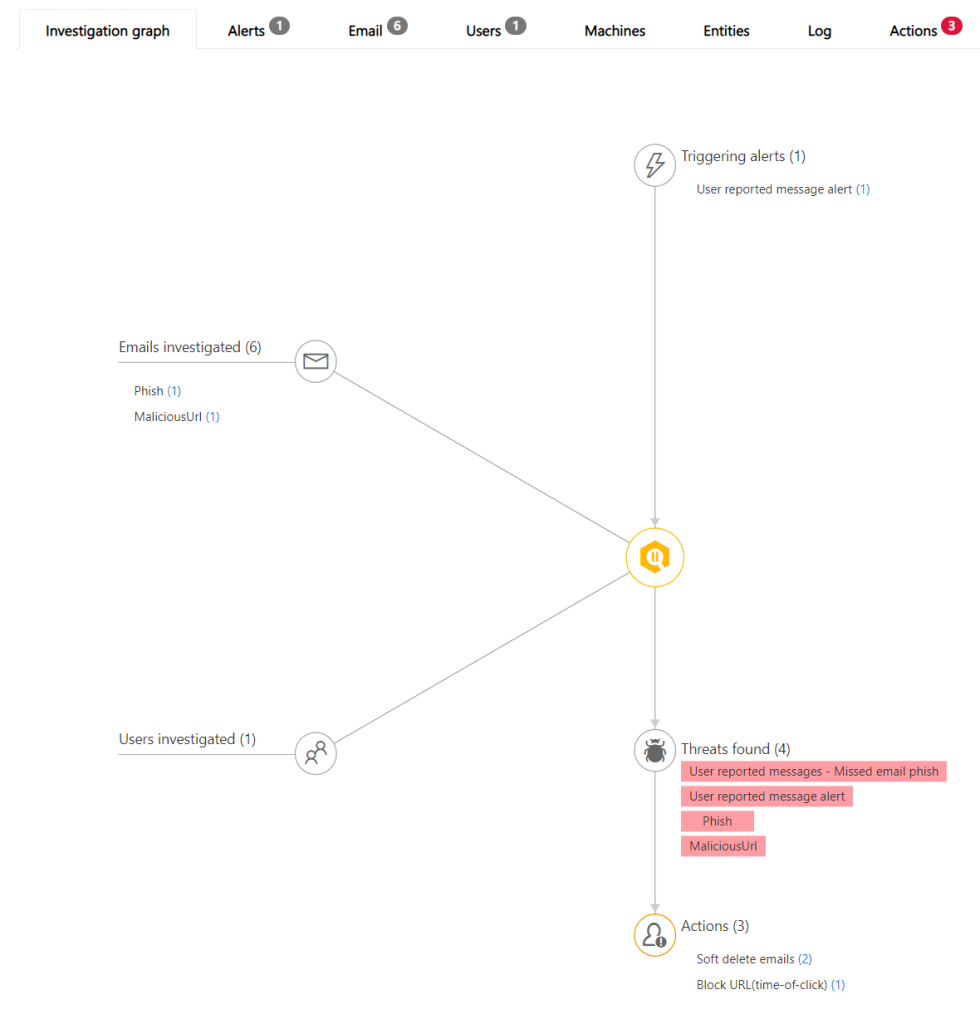
In the overview of the case (the one i reported) we see what`s going on with the message, the Trigger alert, what threats who where found, how many emails are “infected” and which users that have the infected email in their mailbox (could be a mass-phishing attack)
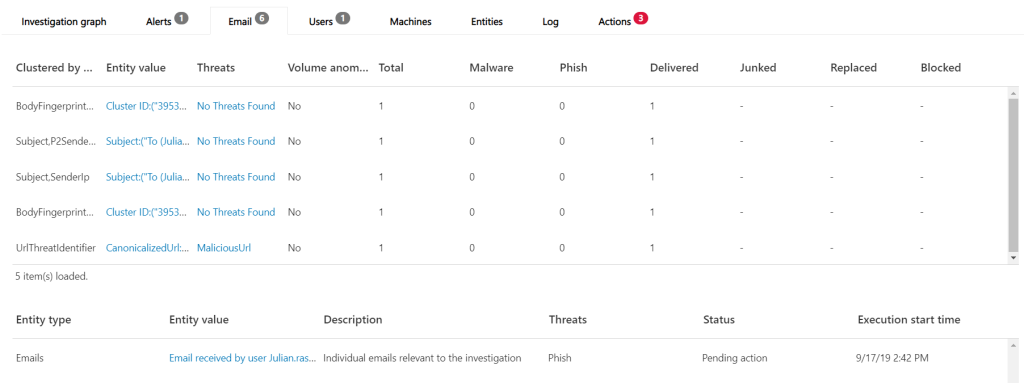
When we navigate to the Email tab we see what section of the email that are found malicious and in this case the Advanced Threat Protection has matched the URL to a malicious URL
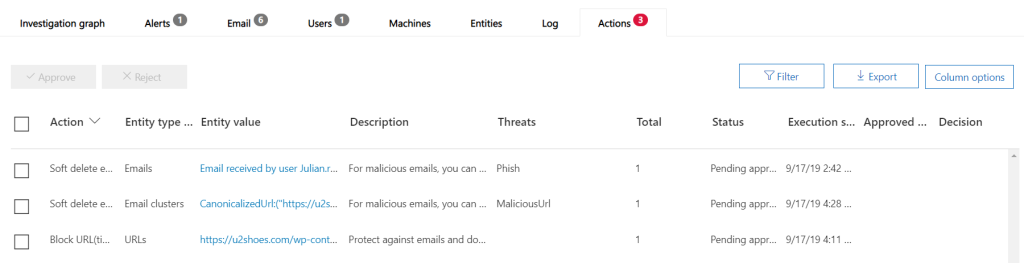
Moving to the Action tab – we are given several a big tool belt meaning that we can do a soft delete from the users mailboxes (in this case only one user, but if this malicious email was delivered to 100 users we can in one click remove the email from the users mailboxes) and block the URL in Safe Links.
So this was very short on how to easily use AIR in your tenant if you have the right license.